Could a single overlooked leak be the start of costly damage that steals usable space and harms your home’s structure?
I’m Douglas Ray Whitehead of Array of Solutions, and I handle every inquiry personally. For over 20 years in the Upstate, I’ve inspected thousands of sites and guided owners through effective basement waterproofing and mold control.
This short guide explains how to waterproof a basement using a practical sequence: diagnose moisture, dry and prep, repair cracks and penetrations, then choose coatings or interior systems that work together without trapping water. Your safety is my future. Call me at (864) 710-6413 or email scmoldremoval@gmail.com for a precise, transferable workmanship warranty and a plan that protects your home with minimal disruption.
Basements often show mold, efflorescence, or musty odors long before structural signs appear. Acting now saves time and money by stopping steady deterioration of walls and foundation. If conditions go beyond DIY, we’ll point out when professional solutions are needed.
Key Takeaways
- Early diagnosis prevents long-term damage and restores usable space.
- Drying and proper prep make coatings and injections effective.
- Interior and exterior strategies must work together for lasting results.
- Know the signs—mildew, stains, condensation, and rusted appliances.
- Contact Array of Solutions for direct, local guidance in Greenville, SC.
Why a dry basement matters right now
Even small amounts of seepage in below-grade rooms often start a chain of rot, air-quality issues, and structural stress. Moisture undermines finishes and can weaken the foundation over time.
A dry lower level protects your home and your health. Reducing water lowers the chance of mold and mildew on walls and stored items. It also keeps mechanical systems from corroding and keeps odors from spreading upstairs.
Preserving this space keeps options open for storage or finishing later without hidden risks. Timely waterproofing prevents small stains or efflorescence from evolving into costly damage that affects framing and finishes.
- Protect structure: persistent water saturates soils and stresses the foundation.
- Guard air quality: less moisture means lower mold and mildew risk.
- Save money: right-sized measures beat repeated repair after cycling wet/dry damage.
At Array of Solutions, we favor the least invasive way to protect your property and breathing air. I’m available to answer questions and guide an effective plan that suits your home and site conditions.

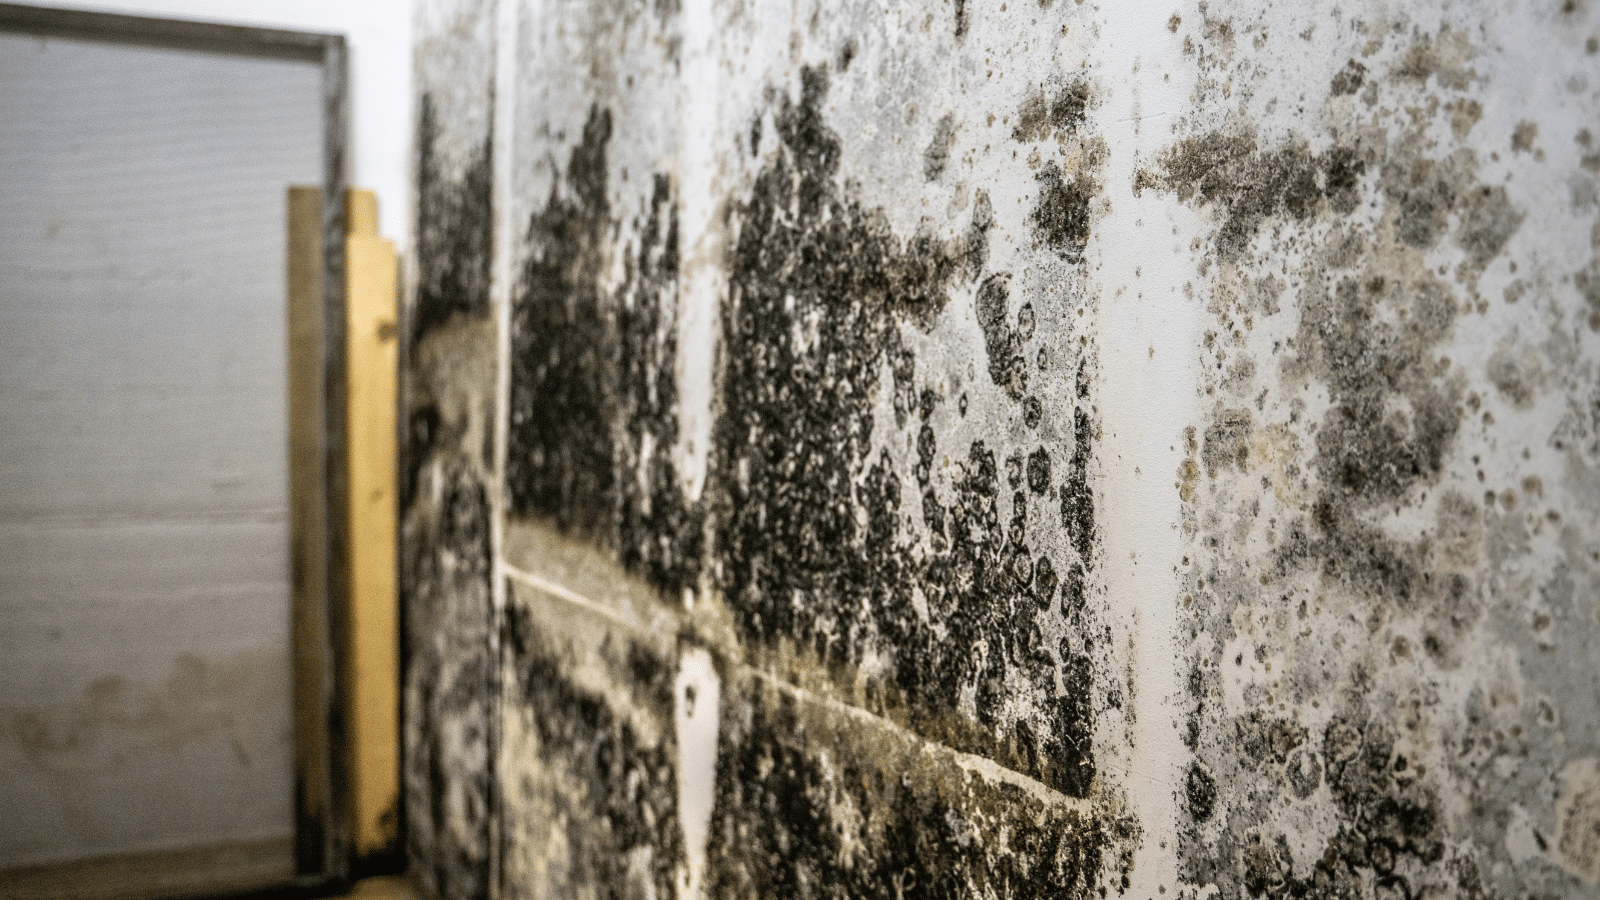
Spot the warning signs and diagnose the source of moisture
Not every damp trace is the same—timing, location, and pattern reveal the likely source.
Common signs include visible mold or mildew, white efflorescence on concrete walls, water stains, wet drywall, condensation on pipes or windows, and rusted appliances. These signs help you map where water appears and when it shows up.
Try the foil test to separate humid air from true seepage.
The foil test
Tape a 1-square-foot piece of aluminum foil to a suspect wall for 24 hours. Condensation on the room-facing side means interior humidity is the culprit. Damp on the wall-facing side signals seepage through the wall.
Red flags for foundation damage
Large, horizontal cracks, bowed walls, and vertical cracks wider than 1/8 inch suggest elevated hydrostatic pressure or foundation movement. Check window wells, pipe penetrations, and the slab/stem-wall joint for concentrated leaks.
- Document signs in each room and note if moisture follows heavy rain or is constant.
- Mark hairline cracks, peeling paint, and spalled mortar; photograph and date each item.
- Look for related issues upstairs—sticking doors or uneven floors can confirm foundation movement.
If you’re unsure what you’re seeing, call or email me directly; I’ll help you interpret the signs and decide the safest next step for your family.
Preparation and safety before you start waterproofing
Start with a clear plan: remove standing water, reduce humidity, and protect circuits before you touch surfaces. Safety is the first priority; shut off power to wet circuits and keep the family clear of contaminated areas.
Dry it out first. Pump standing water, then run fans and dehumidifiers until the space feels dry. Remove damp carpet, padding, and moldy drywall—porous items usually cannot be saved.
Surface prep matters. Clean concrete walls and floors using a long-handled brush and detergent, then rinse and allow full drying time. Scrape and wire-brush efflorescence; if you choose muriatic acid, ventilate and wear gloves, eye protection, and a respirator.
- Begin with safety: power off, pump or wet-vac, then dehumidify.
- Discard soaked materials that harbor mold and odors.
- Treat remaining growth with oxygen bleach for safer mold removal.
- Strip loose paint so sealers can bond to bare mineral surfaces and clear floor drains.
Confirm the space is truly dry before you apply waterproof coatings. If heavy fungal growth or contamination is present, reach out — I’ll advise when professional remediation is warranted for safe, lasting work.
Step-by-step: how to waterproof a basement from the inside
Begin inside with a clear, staged plan that seals entry points and prepares surfaces for lasting protection. Clean each area, assess small openings, and decide when a cured repair needs a backing drain.

Seal cracks and holes efficiently
Wire-brush concrete cracks and vacuum debris first. Fill hairline to 1/4-inch gaps with high-quality silicone caulk. Use hydraulic cement for larger holes that need a rigid, expanding plug.
Detail every penetration
Seal around windows, doors, pipes, and window wells with silicone or low-expansion foam. These spots often let seepage start; a tight joint cuts that path off.
Coatings that bond and protect
Strip loose paint on basement walls so silicate sealers can penetrate. Then apply a waterproof coating, masonry or epoxy paint, or a rubberized barrier in two coats for durable coverage.
When interior drainage is needed
- Start small: seal openings, then monitor for continued leaks.
- If water persists, cut an interior channel, install drain tile, and tie it to a sump basin with a reliable sump pump.
- Test the system and extend discharge away from the foundation.
If you prefer guidance while you DIY, I’m happy to consult and help choose the least invasive way. I’ll also tell you frankly when a professional fix serves your home best.
Exterior drainage and foundation protection that actually work
The right exterior steps stop most leaks before they ever touch your concrete walls. We always begin with the least invasive fixes—grading and roof-runoff control—before recommending excavation or heavy work.
Grading and landscaping
Regrade the perimeter so topsoil slopes away for several feet. Add soil where low spots hold water and remove depressions that pond after rain. Proper slope reduces lateral pressure on the foundation and limits moisture against below-grade walls.
Gutters and downspouts
Keep gutters clear with semiannual cleanings and add extensions so roof water exits well beyond planting beds. Reroute concentrated flows from driveways, condensate lines, or sprinklers so runoff does not collect near the foundation.
Advanced exterior solutions
When surface fixes fail, consider exterior membranes on the wall and a perimeter drain tile at the footing tied to a sump or daylight. This often requires excavation and should be done by experienced crews to protect utilities and landscaping.
- Regrade soil away from the foundation to lower pressure on concrete walls.
- Use downspout extensions and leaders to move water farther from the house.
- Install drain tile where high groundwater or heavy storms overwhelm surface drainage.
Combine exterior measures with interior maintenance. Removing water outside cuts the load any interior system must handle. After work is done, watch the first few rains and confirm runoff moves away cleanly.
Sump pumps, drain tile, costs, and when to bring in a pro
A reliable pump and matched drain system often decide whether wet areas stay dry or become recurring repairs.
Pedestal versus submersible: pedestal pumps cost less and are easier to service. Submersible units move more water and run quieter, but they cost more and take longer to install. Choose based on risk and how often water enters the space.
Discharge matters. Always route discharge away from the foundation and add a check valve. Protect the outlet from freezing or clogging so water cannot cycle back along the wall.
- DIY materials: roughly $3.70–$10 per square foot for coatings and simple interior fixes.
- Typical professional ranges: $2,300–$6,800; whole 1,000‑ft projects often fall between $5,000–$10,000 depending on scope.
- Plan for maintenance: test the pump regularly, clear the pit, and consider backup power if outages are likely.
Call a pro when you see chronic leaks, bowing or wide cracks that suggest hydrostatic pressure or foundation movement, heavy mold growth, or repeated failure after repairs. If you’re weighing DIY versus professional help, call me; I’ll walk you through realistic expectations, costs, and the least invasive plan that protects your home and your time.
Trusted local help in the Upstate: Array of Solutions
Trusted local expertise cuts the guesswork and preserves usable square footage in homes across the Upstate.
Array of Solutions, founded in 2007, is one of the region’s longest-serving environmental consultancies. I’ve completed over a thousand inspections and hundreds of remediations and serve as an Expert Witness in Greenville County Courts.
Why choose us
Least invasive, effective air quality solutions that target moisture at the source and protect finishes and mechanical systems.
- You speak directly with me, Douglas Ray Whitehead, for practical answers and a plan that respects time, budget, and property.
- We tailor basement waterproofing and related work to your home and area, starting with low-disruption steps.
- We stand behind our workmanship with a transferable warranty and clear maintenance guidance.
Call (864) 710-6413 or email scmoldremoval@gmail.com. I’ll review photos, discuss options, and schedule an on-site visit in Greenville and surrounding areas.

Conclusion
A focused finish ties repairs, coatings, and drainage into a reliable defense against moisture.
Start by confirming signs and source, then seal cracks with cement or epoxy and clean concrete surfaces before applying coating or paint. Finish interior work in sequence so floors and walls cure properly.
If leaks continue, add interior drain tile and a sump that discharges well away from the foundation. Exterior fixes — grading, gutters, and selective membranes — lower pressure at the side that matters most.
Ready for next steps? Call Array of Solutions at (864) 710-6413 or email scmoldremoval@gmail.com. I’ll help prioritize actions and design a least‑invasive plan for a dry, usable space.