How to Remove Mold from Walls Safely | Array of Solutions

Table of Contents

Ever wondered how to remove mold from walls when a small spot on a wall could be quietly harming your family’s air? That common stain can lower indoor air quality and trigger allergies or asthma. Acting fast matters, but so does doing the job the right way.

I’m Douglas Ray Whitehead, owner of Array of Solutions in Greenville, SC. I’ve led over a thousand inspections and hundreds of remediations since 2007. You’ll speak with me directly; I handle every inquiry.

In this guide we explain practical, safe steps you can use at home for small areas and when the size or conditions mean professionals should step in. We focus on clear safety rules, proper PPE, and simple air control tips so spores don’t spread to clean rooms.

Your safety is my future. If the affected area exceeds recommended limits, or if you feel unsure, call (864) 710-6413 or email scmoldremoval@gmail.com for an expert evaluation backed by a transferable warranty.

Key Takeaways

  • Small spots can often be handled safely with the right precautions.
  • Protect air movement and wear PPE to reduce exposure risk.
  • Don’t mix cleaning products; fumes can be dangerous.
  • Over 10 square feet usually means call a professional.
  • Array of Solutions offers minimally invasive, warrantied work in Greenville, SC.

Understand the problem before you scrub: safety, size, and indoor air quality

Pause and check three things first: protective gear, how large the spot is, and how air flows.

Safety first: Wear an N95 respirator or equivalent, eye protection, and gloves. These simple steps cut exposure to mold spores and cleaning fumes.

  • Open windows and run exhaust fans for proper ventilation so air moves out, not into clean rooms.
  • Never mix cleaners — combining bleach with vinegar or ammonia makes dangerous gases. Pick one solution and use it safely.
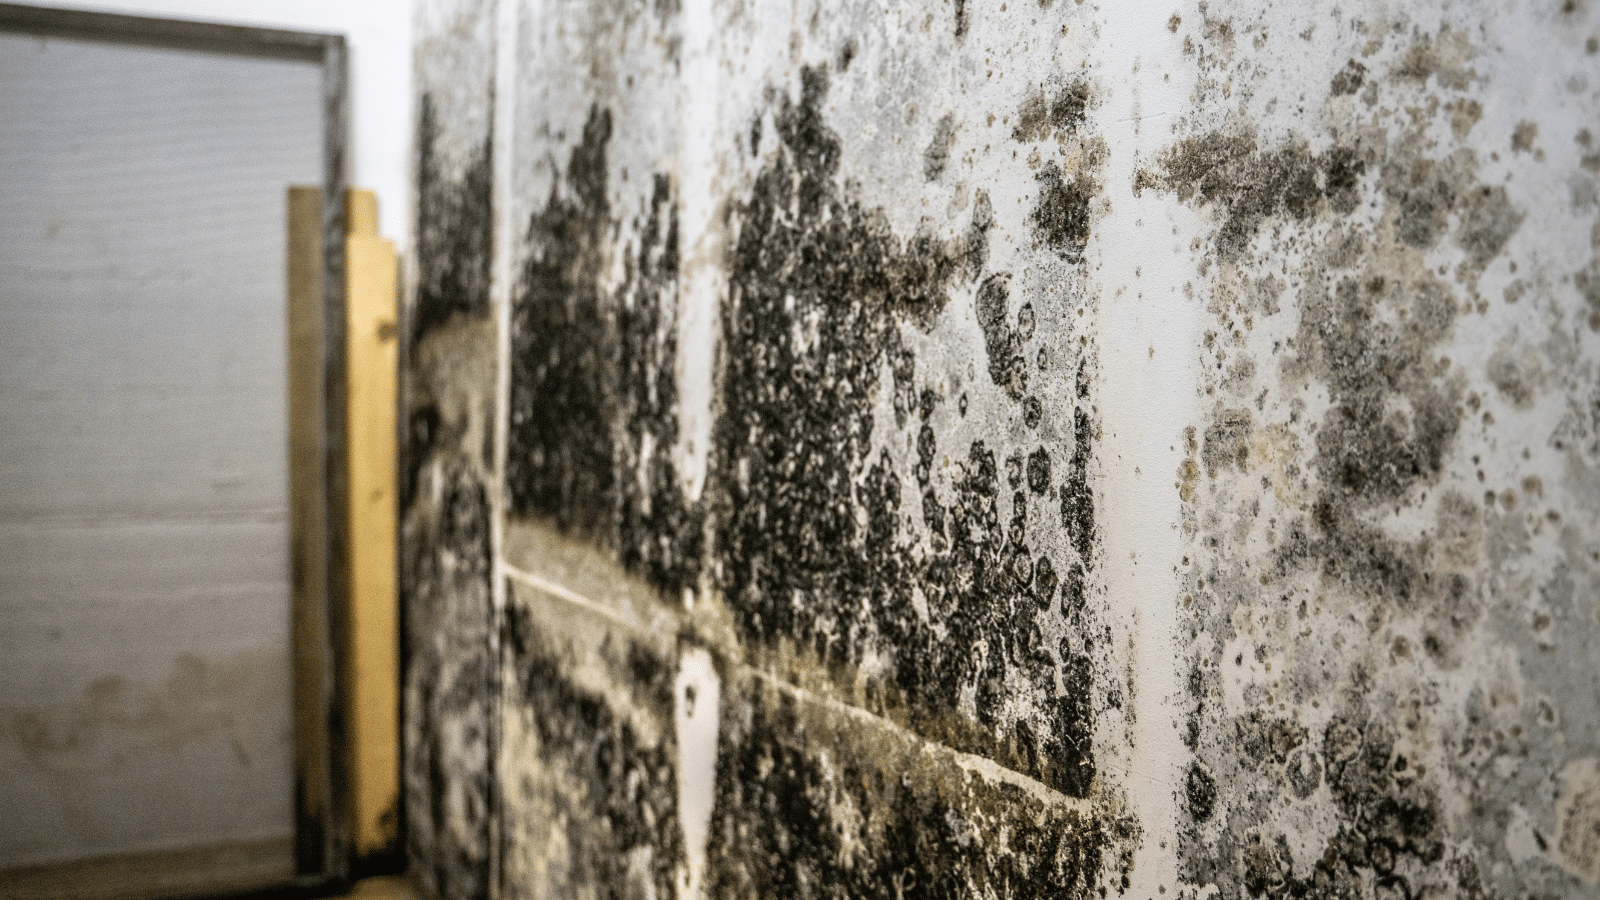
  • If the affected area is larger than about 10 square feet, pause and call a professional for containment and removal.

Watch the material for damage like soft drywall or crumbling sections; hidden moisture may mean deeper growth and longer repairs.

Health note: Mold releases spores that can worsen allergies, asthma, and general respiratory irritation — common in a bathroom or poorly ventilated room.

If you’re unsure about size, symptoms, or moisture, call me at (864) 710-6413 for direct guidance. We prioritize safe, least-invasive practice and will help you plan the next steps.

A close-up image of a dimly lit room with moldy walls, showcasing patches of greenish-black mold spreading across the textured surface. The foreground features a cracked, peeling wall with damp spots, emphasizing the severity of the mold infestation. In the middle ground, a faint outline of a dehumidifier can be seen, symbolizing a solution to the problem, while a window reveals soft, natural light filtering in, contrasting with the gloomy atmosphere inside. The background consists of blurred, indistinct furniture, hinting at an indoor environment. The overall mood is tense yet informative, capturing the essence of indoor air quality concerns and safety. The image should have a sharp focus on the mold details and subtle lighting to enhance the texture, with a wide-angle view that invites the viewer to understand the issue better.

Gather supplies and prep the area the right way

A calm, orderly prep step keeps spores contained and protects your home finishes. We focus on least-invasive supplies and an efficient staging plan so your space stays livable during cleaning.

Tools and solutions

Assemble PPE first: gloves, eyewear, and an N95 or equivalent mask. Then set out a spray bottle and a soft sponge.

  • Mix mild detergent or a vinegar-based cleaning solution with water for painted surfaces.
  • Have baking soda or borax available for stubborn spots; reserve bleach for hard, non-porous areas only.
  • Keep a bucket of clean water and a second bucket for used solution to prevent cross-contamination.

Protect your home

Isolate the work area by closing doors and covering nearby furniture and flooring with plastic sheeting.

  • Position a fan to exhaust outdoors and crack windows slightly to maintain negative pressure in the area.
  • Stage tools: bottle for spray, sponge for gentle agitation, and dry cloths for wipe-downs.
  • Pretest your chosen cleaning solution on an inconspicuous patch so you can make sure the finish holds.
  • Keep pets and family out of the area while work is underway and during drying.

Need help planning prep? Call Douglas at (864) 710-6413 for direct guidance and minimal-impact recommendations.

How to remove mold from walls: a step-by-step guide

We follow a least-invasive sequence: start gentle, then escalate only when needed. That protects paint and drywall while addressing mold promptly.

Painted walls and drywall: detergent, vinegar, and gentle scrubbing

Mix warm water and mild detergent in a spray bottle. Lightly mist the surface, then use the soft side of a sponge for gentle scrubbing.

Rinse with clean water and pat dry. If stains linger, try undiluted vinegar or a 1:1 vinegar-water mix and allow contact time before wiping.

Bleach-based method for non-porous areas

Reserve bleach for hard, non-porous surfaces only. Use 1 tbsp dish soap + 1/2 cup bleach + 1 cup warm water.

Work from the bottom up to control streaking, ventilate well, and then let the surface air dry without wiping.

Stubborn spots and final drying

  • For persistent patches, a borax recipe (2 tbsp borax, 2 oz vinegar, 16 oz hot water) sprayed, scrubbed, and left 10–15 minutes often works.
  • Hydrogen peroxide (3%) can kill mold with repeated applications on stubborn areas.
  • Dry completely: run fans or a dehumidifier and target an air dry finish before rechecking for residual growth.

Make sure you wear N95, gloves, and eye protection. If the area is large or you suspect hidden water, call Douglas at (864) 710-6413 for help.

A close-up view of a wall covered in green and black mold, showcasing the texture and details of the spores in a damp, indoor environment. The foreground features intricate patches of mold with varying sizes and shapes, while the middle ground highlights a distorted layer of peeling paint. In the background, soft, diffused light filters through a window, casting gentle shadows that create a moody, slightly unsettling atmosphere. The lens is set to a macro focus to enhance the mold's intricate details, emphasizing its organic structure. The overall setting feels neglected, aiming to evoke a sense of urgency and the need for intervention while maintaining a professional and safe visual for educational purposes.

Different walls, different methods: painted drywall vs. concrete

Choice of material dictates our approach—gentle on paint, firm on concrete. Painted drywall often holds growth on the surface and responds to mild solutions with light scrubbing. Use minimal water and gentle wiping so the paper facing beneath the paint does not soften.

Test a small, hidden patch first to confirm colorfastness and avoid dulling the paint. For painted surfaces, a detergent or vinegar solution and a soft sponge usually work. Keep contact time short and dry the area quickly with fans.

Concrete and masonry

Concrete and masonry are porous and need firmer action. Pre-wet the surface with your chosen solution, then use a stiff-bristle brush for scrubbing.

  • Rinse thoroughly with clear water to flush residues from pores.
  • Speed drying with airflow and a dehumidifier prevents moisture from wicking back up.
  • Consider applying a concrete sealer or mold inhibitor after cleaning to reduce porosity and future growth.

Note: A bleach pass can help on sealed, non-porous sections but use strong ventilation and PPE. If cleaning uncovers larger damage or a bigger area than expected, pause and call Douglas at (864) 710-6413 for a least-invasive plan.

Prevent mold from returning after removal

Preventing future growth starts with fixing sources of moisture quickly. Address leaks, condensation at windows and roofs, and any plumbing issues as soon as you spot them. Quick repairs remove the wet conditions that feed mold.

Manage indoor humidity and ventilation. Keep humidity between 30–50% with dehumidifiers or AC. Run exhaust fans in bathrooms and kitchens and confirm they vent outdoors, not into attics or crawl spaces.

  • Control humidity levels so moisture won’t collect on cool surfaces.
  • Fix roof, plumbing, and window leaks and recheck after storms or heavy bathroom use.
  • Improve air changes with properly ducted fans and better window performance.
  • Adopt a light aftercare routine: regular cleaning of moisture-prone surfaces, check caulk and under sinks.
  • Only apply mold-resistant paint after surfaces are fully cleaned and dry.

Our mission is to protect your health long after cleanup. For a prevention plan tailored to your Greenville, SC home, call Douglas at (864) 710-6413.

When to call a professional in the Upstate—least invasive, most effective solutions

When growth covers a large area or keeps coming back, professional help makes sense. Call now if you see a large area of visible mold, repeating growth after prior cleanups, or suspect hidden moisture from roofs, plumbing, or foundation in your house.

Professional remediation begins with a focused assessment. We identify the full extent of damage, including behind walls and in low-access spaces, so decisions on scope and budget are clear.

  • Containment: We limit spread of spores during work using least-invasive barriers.
  • Removal: Approved methods and equipment are used for safe and effective cleaning and removing materials when required.
  • Moisture control: Monitoring and correction of the source prevents recurrence and protects air quality.

You’ll speak directly with me, Douglas Ray Whitehead, on every job. I’ve done over a thousand inspections and hundreds of remediations since 2007, serve as an Expert Witness, and stand behind our transferable workmanship warranty.

Call (864) 710-6413 or email scmoldremoval@gmail.com to schedule an assessment in Greenville, SC and surrounding areas.

A close-up view of two walls exhibiting mold in a residential setting, contrasting painted drywall on the left and rough concrete on the right. The painted drywall shows patches of greenish-gray mold spreading sporadically, with paint peeling at the edges, while the concrete wall features darker, more textured mold growth, creating a stark visual difference. Soft, diffused natural light from a nearby window illuminates the scene, casting gentle shadows that enhance the textures. The background includes a blurred section of a living room with neutral decor, emphasizing the focus on the walls' mold. The atmosphere feels heavy and somber, evoking the seriousness of mold issues.

Conclusion

Wrap up with a clear plan: quick action, PPE, and steady drying protect your home and indoor air. For small wall spots, pick one cleaning solution and apply with a spray bottle or sponge. Work gently and let treated surfaces air dry with a fan.

Vinegar, borax mixes, or mild detergent often handle light growth. Reserve bleach for hard, non-porous areas and use gloves, ventilation, and care when you spray. Control humidity and fix any water or moisture sources near windows, kitchens, and bathrooms.

If the problem covers more than about 10 square feet, keeps recurring, or you find hidden water damage, pause and call a pro. Array of Solutions offers least-invasive, effective removal with a transferable workmanship warranty. I’ll take your call at (864) 710-6413 or email scmoldremoval@gmail.com — your safety is my future.

FAQ

What should I check before scrubbing visible growth on interior surfaces?

First, assess safety and scope. Put on gloves, eye protection, and a mask rated N95 or better. Ensure good ventilation by opening windows and running exhaust fans. If the affected area is larger than about 10 square feet, or if mold is inside walls or HVAC, contact a professional for inspection and containment.

Which personal protective equipment (PPE) is recommended for homeowner cleanup?

Use nitrile or rubber gloves, safety goggles, and an N95 respirator. Wear long sleeves and pants you can wash immediately. Avoid bleach and ammonia mixtures — never mix cleaners — and keep airflow directed away from other living areas.

When is a DIY approach acceptable versus hiring a remediation company?

DIY is reasonable for small, surface-only patches under 10 square feet and when the source of moisture is controlled. Call Array of Solutions for recurring problems, large infestations, health impacts, or signs of hidden moisture behind walls.

How does surface contamination affect indoor air quality and health?

Spores and fragments released during cleaning can trigger allergies, asthma, and respiratory irritation. Proper containment, ventilation, and PPE reduce airborne spread. Professional testing can clarify hazards if occupants have chronic symptoms.

What supplies should I gather before starting remediation?

Prepare a spray bottle, mild detergent, white vinegar, baking soda, soft scrub brush or sponge, disposable towels, and access to a vacuum with a HEPA filter. For stubborn spots, borax or 3% hydrogen peroxide can help; use bleach only on non-porous surfaces and sparingly.

How can I protect the rest of my home during cleaning?

Isolate the work area with plastic sheeting if practical, remove or cover furniture and rugs, and run exhaust fans or a window fan to move air outside. Work from the least-contaminated side toward the dirty side to minimize spread.

What’s the step-by-step method for painted drywall and similar surfaces?

Lightly mist the area, clean with detergent and warm water using a soft sponge, rinse, then apply white vinegar spray and let it sit 10–15 minutes before wiping. For repeated spots, follow up with borax or hydrogen peroxide. Rinse and dry thoroughly.

When is a bleach-based solution appropriate, and how should it be used?

Bleach (sodium hypochlorite) is useful on non-porous surfaces like tile and sealed vinyl. Use a diluted solution (about 1 cup bleach per gallon of water), apply carefully with a sponge, avoid splashing, never mix with other cleaners, and ventilate until fully dry.

What are safe options for stubborn, recurring stains on porous materials?

Borax dissolved in warm water or 3% hydrogen peroxide applied to the spot can penetrate better than bleach. Apply, scrub gently, and repeat as needed. If material remains compromised, consider replacement to remove embedded growth.

How do I ensure the area is completely dry after treatment?

Use fans, open windows, and run dehumidifiers until relative humidity is between 30–50%. Start drying from the bottom of the wall upward to push moisture out. Verify dryness with touch and visual checks; trapped dampness invites rapid regrowth.

Do different wall types require different cleaning methods?

Yes. Painted drywall is a surface-clean situation in early stages; use gentle cleaners to protect paint. Concrete and masonry are porous and need stiffer brushing and possibly repeated treatments or a masonry sealer after full remediation.

What repairs or prevention steps stop recurrence after cleanup?

Fix leaks and condensation sources promptly, improve ventilation in bathrooms and kitchens with exhaust fans, and maintain indoor humidity between 30–50% with a dehumidifier. Regular cleaning and using mold-resistant paints in problem areas also helps.

When should I contact a professional in the Upstate, and what will they do?

Call Array of Solutions if you see large areas, repeated growth, hidden moisture, or occupants with health issues. Pros provide assessment, containment, targeted removal, moisture control recommendations, and post-work verification. They also offer transferable workmanship warranties.

Who can I speak with directly about complex cases or inspections?

Contact Douglas Ray Whitehead, Owner and Expert Witness, former contractor and home inspector, for direct consultation. Reach Array of Solutions at (864) 710-6413 or scmoldremoval@gmail.com.

Handling All Of Your Water & Property Damage Emergencies

We are the nation’s premier source for Mold Inspection and Mold Testing. All our mold inspectors are board certified, highly skilled, and experienced mold service professionals

Air Quality Testing

Air quality testing can tell you whether you have a mold problem even if you cannot find the evidence mold growth. We test air samples from your home or business for the concentration of mold spores. Samples are taken from the air and are later examined under a microscope in our labs.

Water Damage Repair

Our water extraction equipment will remove the majority of the water from the affected area(s) including carpets and upholstery. After that we use industrial fans, desiccant drying equipment and dehumidifiers to rapidly dry the still wet areas. We then use a HEPA filtered vacuum to clean up.

Mold Inspections

We visually inspect to pinpoint the problem areas in your home or business. we then try to pinpoint the source of the moisture which is most likely the reason that you may have a mold problem. Swabs and air samples will be taken to our laboratory for analysis and recommendations for remediation.

Mold removal

The source of the water must be identified and corrected . All wet materials (including carpets and upholstery) must be dried completely. Removal of all items including furniture from the infected area. Contaminated area must be sealed off from the rest of the property. Mold growth on surfaces is sanded and cleaned. Contained area must be completely dried, filtered and fumigated

Post Mold Remediation

After mold had been removed, Post Remediation Verification Inspection (PRVI) can assure that the mold cleanup has been done correctly and effectively in the work area and confirm that the cleanup did not accidentally distribute high levels of moldy dust and debris into other areas of the building or into its mechanical systems such as heating or air conditioning systems.

Insurance Handling

Home insurance companies usually don't cover mold damage unless it's directly related to a "covered peril" such as Fire; Lightning; Vandalism or malicious mischief; Damage caused by vehicles; Theft; Falling objects; Weight of ice, snow, or sleet; Accidental discharge or overflow of water or steam; Frozen pipes. Our experts will assist you in filling the insurance claim.

Mold Removal

Mon-Sat: 8:00 am-5:00 pm
24/7 Service Available

Share:

Fast, Certified Mold Testing & Remediation in Greenville, SC

Get accurate inspections and rapid removal from certified technicians. We assist with insurance claims and support property managers.

Request Your Inspection Today